Parent Resources

Assignment Sheet Overhaul!

New Year, New Assignment Sheets!

From now on, you’ll see two new categories on our weekly assignment sheets: Replay and Remix.

Replay

Occasionally, students will choose a “Replay” piece to review. They may choose any piece they’ve played in the past—all lengths and difficulty levels are possibilities. For example, a student working from Book 3 in their method could choose a favorite piece from Book 1 and replay it, applying the skills and knowledge they have now that they didn’t have before. A heartfelt thank you to fellow piano teacher Christina Whitlock for sharing her concept of a Replay Week, which inspired this new weekly assignment category—her podcast can be found here.

REMIX

Students will also have an periodic “Remix” assignment that goes beyond review by playing an in-progress or previously-mastered piece in a new, creative way. Possibilities include:

  • Transposing the piece to another key.

  • Playing a major-key piece in its relative minor key.

  • Playing all the articulations or dynamics oppositely from what is written.

  • Playing the piece in a different meter. A current student favorite is going all the way back to Charlie Chipmunk (the first piece in Piano Safari Book 1) and playing it in 3/4, 5/4, 6/8, and even 7/8 time.

  • Composing a new section of the piece, transforming it to ABA form. For example, the original piece could serve as the A sections, and the student would compose a short, contrasting B section.

  • Activities from the “Do it Again!” menu are also great for remixing pieces.


Other Additions

Since Google Drive has become such a huge part of tracking assignments, student progress, and practice reminders, the last addition to the weekly assignment is a Google Drive column. A simple checkmark indicates when online resources are available to support practice at home.

Here’s to a new year and a more streamlined way to track assignments!


Making Continuous Fluid Motion Part of At-Home Practice

rhythm:

Latin rhythmus, from Greek rhythmós; “to flow”

What is continuous fluid motion?

Continuous fluid motion involves moving the body in a smooth, uninterrupted way. The concept is rooted in dance and movement education, and music educator and researcher Edwin Gordon coined the phrase “continuous fluid motion” to help introduce the activity to the music-teaching realm. Continuous fluid motion (CFM) is an important activity for young musicians because it prepares them to move rhythmically (i.e. to a beat). It precedes formal rhythmic training, which is why my youngest beginners often go home with unconventional piano lesson assignments like “pretend to stir soup” or “pretend to push something heavy across the room” These playful movements are doing important work!

Why incorporate continuous fluid motion?

  • Develops body awareness.

  • Helps children explore balance and directionality.

  • Is a basis for syncing the breath with movement, musical thinking, and singing (Westervelt).

  • Large purposeful movements prepare students for small purposeful movements.

  • It’s fun! Continuous fluid motion is a great off-the-bench piano lesson activity.

Continuous fluid motion is fundamental in internalizing pulse, meter, and rhythm. Rhythm moves through time, and movement exploration helps students “measure the amount of time in and between beats” (Valerio). One of my favorite things about implementing CFM is that students who have experienced this kind of purposeful-yet-free movement grow into comfortable and natural improvisers!

Laban Movements

Rudolf Laban (1879–1958), a movement educator and dance theorist, developed a system for describing movement using four elements:

  • Space – the direction we move

  • Weight – how strong or gentle the movement feels

  • Time – how quickly or slowly we move

  • Flow – how controlled or free the movement feels

By exploring these elements in different combinations, students experience a wide spectrum of expressive possibilities—long before we name those qualities in musical or technical terms.

Examples of continuous fluid motion

These are just a few examples of CFM that can be done easily at home while listening to music, singing, or chanting.

  • Pretend to push something heavy up a hill.

  • Pretend to swim through water. What about swimming through mud? Through jello? Can you dive down deep? Can you splash at the surface of the water?

  • Paint the room by flicking imaginary paint off your fingers. What if you painted the room with a different body part, like your nose? Can you imagine what you want the painting to look like, then create it with your movements?

  • Stir an imaginary pot of soup. As you add ingredients, does it get harder to stir?

  • Pick up an imaginary teacup, feather, brick, or other objects of varying weights.

  • Move as though you’re an elephant, a cat, a hummingbird, a snake, a cheetah, a hippo, a sloth, etc.

    • Students in the Piano Safari method especially love moving like each of the animals represented in rhythmic patterns (Leo Lion, Tall Giraffe, Charlie Chipmunk, etc.) before imitating the patterns themselves.

  • Pretend to be a flower growing.

  • Pretend to be a tree swaying in the wind.

  • Pretend to drive a car. Go fast, slow, or in-between. Is the road straight or curvy? Smooth or bumpy?

Once students become comfortable with continuous fluid motion, their creativity expands quickly. What begins as playful movement becomes intentional expression—and that expression transfers naturally to the keyboard.

Sources:

Valerio, W. The gordon approach: Music learning theory. https://www.allianceamm.org/resources/gordon/

Westervelt, T. G. (2002). Beginning Continuous Fluid Motion in the Music Classroom. General Music Today, 15(3), 13-19. https://doi.org/10.1177/104837130201500305

Preparing for a Recital

9 practice strategies for a solid performance

The Winter Recital is quickly approaching! As students prepare to showcase their hard work, it’s helpful to incorporate performance-specific strategies into everyday practice. Here’s a quick list of things to do (and not do!) in the weeks before a performance.

What to Do

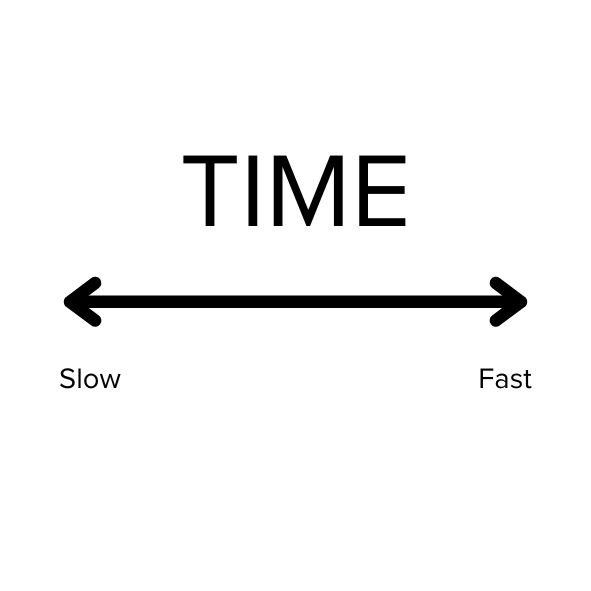
Practice Slowly (Sloth Speed)

Accurate slow practice prevents us from practicing mistakes into our muscle memory. How slow is slow? I typically tell students to find a tempo that they think is slow—then make it even slower! Playing slowly and intentionally helps build restraint and mitigate the tendency to rush under pressure.

Quiz the Beginning

Several times a day, walk to the piano as if it were the day of the recital. Take your time, ensuring that the bench is at a comfortable height and distance from the keyboard. Find the starting position of your piece, play the first few measures, then stop. This practice strategy only takes a few moments, and playing the beginning of the piece at varying times throughout the day will cement the process of beginning a performance into the long-term memory.

Work Backwards

It’s also helpful to emphasize the end of a piece to ensure a strong and confident finish. Spend time with the few measures of your piece. Listen closely to your sound: does it tell the story or communicate the idea that you have in mind? You may also do cumulative backwards practice. For example, play the last line of the piece, then the last two lines, the last three lines, etc., until you’ve worked back to the beginning.

Create Landmarks

Use the structure of your piece (e.g. ABA form, binary form, etc.) to create several reliable starting points. The beginning of each formal section is a great starting point; from there, individual phrases or changes in dynamics, texture, rhythmic patterns, or hand position are suitable landmark locations. If you make a mistake and have difficulty moving past it, you can go forward (never back!) to the nearest landmark rather than the beginning of the piece. Landmarks are especially helpful when working from memory! Some students even give creative names to each section to make landmarks memorable.

Mock Performances

Students can practice performing for family, friends, and even pets! Be sure to include walking to and from the piano and bowing into at-home performances!

Things to think about in a mock performance:

  • How will I approach the piano?

  • How will I start and end the piece?

  • What will I do if I make a mistake?

  • How will I bow?

  • How will I leave the stage?

Record yourself

Recording your playing allows you to listen to yourself in a new, objective way. The recording might reveal parts of the music that need a bit more practice. For example, perhaps some dynamic contrasts are not as pronounced as you thought, or there are passages where the melody isn’t projecting enough. Being aware of any issues uncovered in the recording can help guide practice in the weeks before a performance, ensuring smart use of time.

Becoming comfortable listening to our playing can also help us to look on the bright side; if you made a mistake while playing for the camera, you might realize upon listening that the blunder isn’t nearly as big as it felt in the moment. This awareness builds resilience!

Practice “in Your Brain”

Mental practice is a powerful tool, and you can do it anywhere! Think through your piece from beginning to end, singing it in your head. Where are the loud parts? The soft parts? What is happening in the musical story?

Create a Mantra

As I prepared for my graduate recital, I developed a mantra to recite when anxious or negative thoughts crept in. My mantra was “you’ve done the work,” referring to the countless hours of practice and care I poured into my recital program. Creating a mantra that addresses your unique challenges can help control pre-performance jitters and steady your thoughts before you walk onstage.

Mindfulness Exercises

Take a deep breath through your nose. Feel the cool sensation of the inhale in the back of your throat. Focus on that feeling. Repeat this process, adding a predictable rhythm (e.g., breathe in for four beats and out for four beats). This exercise can help you feel less nervous and distract you from worried thoughts.

What Not to Do

Practice too much

Over-practicing before a performance can lead to fatigue, burnout, and even repetitive stress injuries—especially if you suddenly increase the amount of daily practice to “cram” for a performance. If you’ve exercised good practice habits leading up to the recital, there’s no need to add excessive time to your practice routine.

Last-minute changes

Changing fingerings and major interpretive elements close to a performance isn’t ideal. Last-minute changes can disrupt pre-performance practice routines and be a distraction during the performance itself. Stability fosters confidence!


Trust in the hard work you’ve put in and know that everyone at the recital is rooting for your success! I look forward to all the beautiful performances we’ll enjoy on December 10!

Creative Ways to "Do it again!"

Repetition is a fundamental part of piano practice, but it’s not always a favorite part of practicing. These are ways that I ask students to “do it again” with flair. Each item is designed to be musically meaningful and to keep repetition intentional.

Every variation below targets a specific skill. For example, playing a passage “oppositely” highlights its intended character, and shifting octaves helps students hear something familiar in a new way. These strategies work best after students have spent time establishing accurate notes and rhythms.

  1. Play while singing the melody.

  2. Play the right hand one octave higher and the left hand one octave lower.

  3. Play small sections with your eyes closed.

  4. Play the piece at different tempos (e.g. largo, adagio, andante, allegro, presto).

  5. For primer-level pieces written for one hand, play the right and left hands together in parallel motion.

  6. Make the piece sound like different animals (e.g. play it high like a bird, or low like a whale).

  7. Play all dynamics oppositely (e.g. loud becomes soft, etc.).

  8. Play all articulations oppositely (e.g. legato becomes staccato).*

  9. Play and sing the accompaniment.

  10. Play and say each downbeat (beat 1) out loud.

  11. If the piece has multiple voices, play while singing or humming the soprano, alto, tenor, or bass line—alternate which voice you sing with each repetition.*

  12. Transpose the piece to another key.

*These activities are best suited for more advanced students

An easy way to incorporate strategic repetition is to gamify it. I write different repetition strategies on popsicle sticks and allow students to draw one at random, selecting only those appropriate for their level and stage of learning. The mystery of which stick they’ll pull keeps students eager to build the habit of repetition. The best part is that this game is easily replicated at home. Students may even get creative and brainstorm their own ways to repeat a section!

Perfect Practice: Part 2

Five More Strategies for Successful Practicing

Positivity is Contagious

The tone of a practice session matters. There will be days when your child feels reluctant to practice—and days when you do, too. Even so, the atmosphere adults create has a significant impact on how practice unfolds. Announcing that it’s time to practice with a friendly—not demanding or nagging—tone is a good place to start.

Although part of piano practice is identifying and correcting mistakes, it’s also important to focus on what the student is doing well. Without giving excessive praise, aim for a healthy balance of constructive. comments and positive feedback: for every correction, acknowledge one or two strengths you observe during the session.

Avoid Mirroring Tension

Sometimes, tension will build in at-home practice sessions. Perhaps your child is reluctant to practice altogether, or is frustrated with challenging parts of their assignment—no matter the issue, tension will escalate when met with more tension. Young children are still developing emotional regulation skills, so adults often need to take the lead in diffusing tension. Diffusing tension may including pausing for a moment to tell joke and have a laugh, offering praise for effort if the student is working diligently on something challenging, or keeping communication open by having the student evaluate their own work. What do they feel is the hardest part of a particular practice session? In what areas do they feel like they are excelling?

Be Fair and Follow Through

Students thrive when expectations are consistent and reasonable. To feel safe, communicate openly, and be freely creative, students need to trust that their teachers will not give them more than they can handle, hold them to unrealistic standards, or be inappropriately picky.

At home, parents temporarily step into a teaching role, and fairness matters just as much there as it does in lessons. Avoid asking the student to do more than is listed on the weekly assignment, and be consistent with requests—it isn’t fair to have a student play a passage ten times if five times was the agreement. Consistency builds trust, and trust supports effort.


Deep Dive: Give Rewards—But Know How to Use Them

Some families choose to use rewards to encourage practice. When used thoughtfully, rewards can acknowledge effort without replacing intrinsic motivation. In Drive: The Surprising Truth About What Motivates Us, Daniel Pink distinguishes between two types of rewards:

  • If-Then rewards (“If you practice, then you earn…”), which are anticipated and tied directly to task completion.

  • Now-That rewards, which are unexpected acknowledgments of effort, focus, or persistence.

Research suggests that frequent If-Then rewards can shift attention away from enjoyment and toward the reward itself. Over time, they may need to increase in size or frequency to maintain the same effect. Now-That rewards, by contrast, recognize qualities such as focus, independence, and perseverance.

If-Then rewards ultimately stifle creativity and inhibit deep thinking. This is because the focus is on the short term and the reward itself. Pink also explains how If-Then rewards can deflate motivation: “If-Then rewards require people for forfeit some of their autonomy…And that can spring a hole in the bottom of their motivation bucket, draining an activity of its enjoyment” (36). When an enjoyable task becomes a job, our motivation to perform the task out of genuine excitement interest declines.

If-Then rewards are also hard to maintain because they are anticipated by recipients, who come to then expect rewards upon completion of similar tasks. Pink notes, “…before long, the existing reward may no longer suffice. It will quickly feel less like a bonus and more like the status quo—which then forces [the use] of larger rewards to achieve the same effect” (53).

Now-That rewards, on the other hand, foster intrinsic motivation because they allow students to see the relationship between their behavior and rewards. What do Now-That rewards look like in the context of piano lessons and practice? Here are a few examples:

  • When the student accomplishes their practice goals before their practice session is finished, reward their focus and effort by allowing some time for games via music apps. Explain that the surprise app time is a result of their focus.

  • When the student successfully uses visual aids included in their take-home pouch (e.g., fuzzies, picture cards), reward them with some fun, affordable manipulatives like Iwako erasers or finger puppets. Mention that since they know how to use those aids so well, you got them some new, cool ones!

  • When the student uses practice strategies independently, reward their ownership with a treat.

Because they are a surprise, Now-That rewards should always be followed up by explaining why the reward was given—this will get the student eager to show off their good attitude and effort in the future!

What I Don’t Use as Rewards

Creative activities—such as improvisation or musical games—are integral parts of music learning in my studio. For that reason, I do not use them as rewards or withhold them as consequences. They are part of the learning process itself.


For more a in-depth look at rewards and motivation, I recommend reading Daniel Pink’s book or giving this episode of Dr. Ashley Danyew’s podcast, Field Notes on Music Teaching & Learning, a listen.

Getting the Most from Online Lessons

What to do before, during, and after online lessons


A sudden switch to online lessons in the middle of a pandemic isn’t everyone’s ideal learning situation, but some simple measures can be taken to make virtual lessons smooth, enjoyable, and productive.


Before Enrolling

Time Commitment

Online lessons sometimes require a slightly different rhythm than traditional lessons. Teachers may ask students to:

  • Submit short video recordings ahead of time

  • Send mid-week progress clips

  • Watch an instructional video before the lesson (this is called flipped learning)

Younger students will need assistance completing these tasks, in addition to regular practice.

Scheduling

If possible, schedule lessons when Internet traffic is light and noise in the house is minimal. With entire families working and learning at home, I understand that this might be difficult—keep reading for tips on maximizing Internet speed.


Before the Lesson

Materials

  • Sign up for Zoom if you haven’t already.

  • Have all materials ready (lesson books, sheet music, flashcards, pencil with eraser, etc.).

  • Use sticky notes or flags to mark relevant pages.

  • Complete any requested score markings (measure numbers, highlighted accidentals, etc.).

  • Make sure all devices are fully charged or plugged in.

Camera Placement

Position the camera to show the student’s upper body, arms, hands, and keyboard. A side view—either to the left or right of the student—often works well. The student can turn slightly toward the camera when speaking.

Internet Connection

Check your internet connection using Speedtest. A download speed of 10 Mbps is ideal if multiple people are using the internet, though 2 Mbps can work for a single user.

If possible:

  • Move your router closer to the piano.

  • Use an ethernet cable if your device will accept one.

  • Limit high-bandwidth activity during lesson time.

Lighting

If the room is very bright, close blinds or curtains to prevent wash-out. Light should come from in front of the student to avoid glare and shadows.


During the Lesson

  • Parents should be present to help take notes, handle manipulatives, solve technical issues, and help young students listen for cues. Even some of my high school students choose to have their parents nearby during their lessons!

  • The teacher, student, and parent will take turns talking and playing to save time, using cues like “my turn” or “your turn” to eliminate confusion.


After the Lesson

  • Download the recorded lesson to review later, if applicable.

  • If the teacher assigned any flipped learning activities, add the due dates to your calendar, or set a reminder on your smartphone. Help your student complete and submit the assignments.

  • Encourage your student to practice. Younger students may require supervision and guidance as they practice.

  • Be sure to give praise! For students accustomed to in-person lessons, a sudden switch to online lessons can be stressful and confusing. Compliment your student on their effort, resilience, and willingness to try new things.


For more resources on piano lessons during the COVID-19 pandemic, see these tips published by The Frances Clark Center and Piano Magazine.